Installing new flooring can transform a space, but the process often comes with questions, especially when considering laying one type of flooring over another. A common query homeowners have is: Can you lay vinyl flooring over tile? The short answer is yes, in most cases, you can install vinyl flooring over existing tile, but there are important considerations, preparation steps, and best practices to ensure a successful installation.
In this comprehensive guide, we’ll explore everything you need to know about laying vinyl flooring over tile, including benefits, challenges, preparation, installation methods, and maintenance tips.
Why Choose Vinyl Flooring Over Tile?
Vinyl flooring has surged in popularity due to its versatility, affordability, and aesthetic appeal. Before diving into the installation process, let’s examine why you might want to lay vinyl flooring over tile in the first place:
1. Cost-Effectiveness
Removing existing tile can be labor-intensive and costly. It often involves demolition, disposal of old materials, and potentially repairing the subfloor. Laying vinyl over tile eliminates these steps, saving both time and money.
2. Aesthetic Versatility
Vinyl flooring comes in a wide range of styles, from realistic wood and stone looks to modern patterns. It allows you to refresh the look of a room without the expense of replacing tile entirely.
3. Durability and Comfort
Vinyl is durable, water-resistant, and softer underfoot than tile, making it a comfortable choice for kitchens, bathrooms, or high-traffic areas. It’s also low-maintenance, requiring only regular sweeping and occasional mopping.
4. Ease of Installation
Vinyl flooring, especially luxury vinyl planks (LVP) or tiles (LVT), is designed for straightforward installation. Many products feature click-lock systems or peel-and-stick backings, making them ideal for DIY projects, even over existing tile.
5. Minimal Disruption
Installing vinyl over tile avoids the mess and disruption of tile removal, which can create dust, noise, and debris. This is especially beneficial in homes where minimizing downtime is a priority.
However, while laying vinyl over tile is often feasible, it’s not always the best solution for every situation. Let’s explore the factors you need to consider.
Can You Lay Vinyl Flooring Over Tile? Key Considerations
While it’s possible to install vinyl flooring over tile, certain conditions must be met to ensure a smooth, long-lasting result. Here are the key factors to evaluate:
1. Condition of the Existing Tile
The existing tile must be in good condition. This means:
- No Cracks or Loose Tiles: Cracked or loose tiles can cause instability, leading to issues with the vinyl flooring above. Any damaged tiles should be repaired or replaced before installation.
- Level Surface: Significant unevenness, such as raised or sunken tiles, can create an uneven surface for the vinyl, leading to potential damage or an unappealing finish.
- Clean and Smooth: The tile surface must be free of dirt, grease, or other contaminants that could interfere with adhesion, especially for peel-and-stick vinyl.
2. Type of Vinyl Flooring
Not all vinyl flooring is created equal, and the type you choose impacts whether it can be installed over tile:
- Luxury Vinyl Planks (LVP) or Tiles (LVT): These are rigid and often have a click-lock system, making them suitable for floating installations over tile.
- Sheet Vinyl: This requires a smooth, flat surface and may need an underlayment to cover grout lines or tile texture.
- Peel-and-Stick Vinyl: These tiles adhere directly to the existing surface, so the tile must be smooth and clean for proper adhesion.
3. Grout Lines
Grout lines between tiles can create an uneven surface, which may telegraph through thin vinyl flooring, creating visible lines or weak points. Deeper grout lines may require filling or leveling before installation.
4. Subfloor Stability
The subfloor beneath the tile must be stable and structurally sound. If the subfloor has issues like water damage or flexing, these must be addressed before installing vinyl.
5. Height Considerations
Adding vinyl flooring over tile increases the floor height, which can affect transitions to other rooms, door clearances, and appliances. Measure the height difference to ensure it won’t cause issues.
6. Moisture and Environmental Factors
Vinyl is water-resistant, but if the existing tile is in a moisture-prone area (like a bathroom), ensure there are no underlying moisture issues that could affect the new flooring.
If these conditions are met, laying vinyl over tile is a viable option. Let’s move on to the preparation and installation process.
Preparing to Lay Vinyl Flooring Over Tile
Proper preparation is critical to a successful installation. Follow these steps to ensure your tile surface is ready for vinyl flooring:
Step 1: Inspect and Repair the Tile
- Check for Damage: Walk across the floor to identify loose, cracked, or missing tiles. Tap tiles with a hammer to listen for hollow sounds, indicating loose tiles.
- Repair Cracks: Use a tile repair compound or epoxy to fill cracks or replace damaged tiles.
- Secure Loose Tiles: Re-adhere loose tiles with thin-set mortar or tile adhesive.
- Replace Missing Tiles: If tiles are missing, replace them to create a uniform surface.
Step 2: Clean the Tile Surface
- Remove Debris: Sweep or vacuum the floor to remove dirt, dust, and debris.
- Deep Clean: Use a degreaser or tile cleaner to remove grease, soap scum, or stains. Avoid wax-based cleaners, as they can interfere with adhesion.
- Dry Thoroughly: Ensure the surface is completely dry before proceeding.
Step 3: Address Grout Lines
- Evaluate Grout Depth: If grout lines are shallow (less than 1/8 inch), they may not require filling, especially for thicker LVP or LVT. Deeper grout lines may need leveling.
- Fill Grout Lines: Use a self-leveling compound or floor patching compound to fill deep grout lines. Apply with a trowel, smooth the surface, and let it cure according to the manufacturer’s instructions.
- Sand if Necessary: After the compound dries, sand the surface lightly to ensure smoothness.
Step 4: Check for Levelness
- Use a Level: Place a long level across the floor to check for uneven areas. High spots may need grinding, while low spots may require additional leveling compound.
- Ensure Flatness: The surface should be flat within 1/8 inch over a 10-foot span to prevent issues with vinyl installation.
Step 5: Consider an Underlayment
- When to Use: For sheet vinyl or thin vinyl tiles, an underlayment can help smooth out minor imperfections and provide cushioning. LVP with attached padding may not require an underlayment.
- Types of Underlayment: Plywood, cork, or foam underlayments are common choices. Ensure the underlayment is compatible with your vinyl product.
Step 6: Plan for Transitions
- Measure Floor Height: Calculate the new floor height (tile + vinyl + underlayment) and ensure it aligns with adjacent rooms.
- Install Transition Strips: Plan for transition strips or reducers to bridge height differences between rooms.
Step 7: Gather Tools and Materials
You’ll need:
- Vinyl flooring of your choice
- Measuring tape and straightedge
- Utility knife or vinyl cutter
- Level and trowel (for leveling compound)
- Adhesive (for glue-down vinyl) or spacers (for click-lock systems)
- Cleaning supplies
- Safety gear (gloves, knee pads, etc.)
Installation Methods for Vinyl Flooring Over Tile
The installation process depends on the type of vinyl flooring you’re using. Here are the main methods:
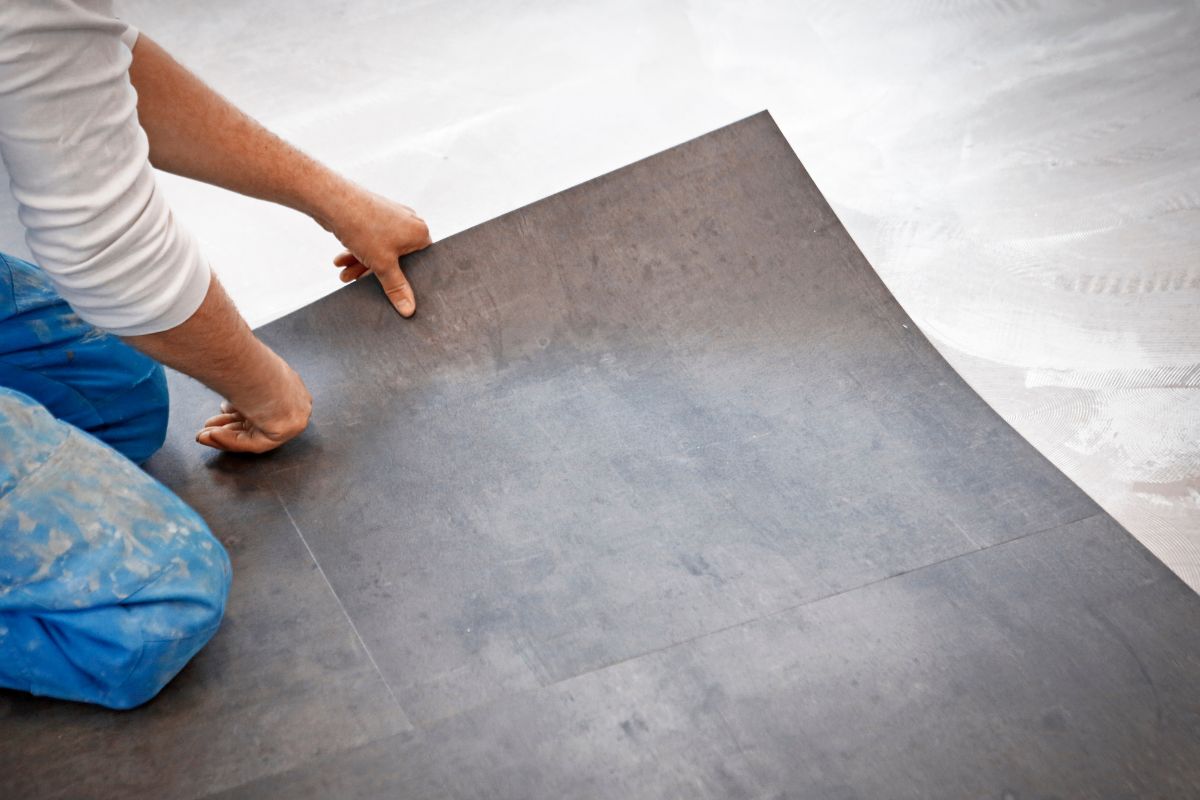
1. Floating Vinyl (Click-Lock LVP or LVT)
Floating vinyl doesn’t require adhesive, as planks or tiles lock together and “float” over the subfloor.
- Start in a Corner: Begin in a corner of the room, ensuring the first row is straight using spacers along the wall.
- Click and Lock: Angle each plank or tile into the previous one to lock it in place. Stagger seams for a natural look.
- Cut to Fit: Use a utility knife to cut pieces for edges or obstacles like doorways or vents.
- Install Baseboards or Trim: Cover expansion gaps around the perimeter with baseboards or quarter-round trim.
2. Glue-Down Vinyl
Glue-down vinyl requires adhesive to bond the flooring to the tile.
- Apply Adhesive: Spread adhesive over the tile surface using a notched trowel, following the manufacturer’s guidelines.
- Place Vinyl: Lay the vinyl tiles or sheets carefully, pressing them firmly into the adhesive.
- Roll the Surface: Use a floor roller to ensure proper adhesion and eliminate air bubbles.
- Trim Edges: Cut excess material along walls or obstacles.
3. Peel-and-Stick Vinyl
Peel-and-stick vinyl is the easiest for DIYers but requires a perfectly smooth and clean tile surface.
- Start at the Center: Mark the room’s center and work outward to ensure symmetry.
- Peel and Press: Remove the backing and press the tile firmly onto the surface, ensuring no air bubbles.
- Cut to Fit: Trim tiles as needed for edges or corners.
4. Sheet Vinyl
Sheet vinyl is installed in large pieces and often requires adhesive.
- Create a Template: Use craft paper to create a template of the room’s shape, including cutouts for obstacles.
- Cut the Vinyl: Lay the sheet vinyl on a flat surface and cut it to match the template.
- Apply Adhesive: Spread adhesive over the tile and carefully lay the sheet, smoothing it out to avoid wrinkles.
- Seal Edges: Use caulk or seam sealer along edges to prevent moisture infiltration.
Tips for a Successful Installation
- Acclimate the Vinyl: Let the vinyl flooring sit in the room for 24–48 hours to adjust to the temperature and humidity.
- Follow Manufacturer Instructions: Each vinyl product has specific installation guidelines. Read and follow them carefully.
- Work in Small Sections: For glue-down or peel-and-stick vinyl, work in small areas to ensure precision.
- Use Proper Tools: A vinyl cutter or sharp utility knife ensures clean cuts, especially around corners or fixtures.
- Check for Square: Ensure the first row is perfectly straight, as it sets the alignment for the entire floor.
Common Challenges and Solutions
Even with proper preparation, you may encounter challenges when laying vinyl over tile. Here’s how to address them:
1. Telegraphing Grout Lines
- Solution: Use a thicker vinyl product (at least 4mm) or add an underlayment to minimize the visibility of grout lines. Filling grout lines with a leveling compound also helps.
2. Adhesion Issues
- Solution: Ensure the tile is thoroughly cleaned and free of contaminants. For peel-and-stick vinyl, consider priming the tile surface with a compatible primer.
3. Uneven Tiles
- Solution: Grind down high spots or use a self-leveling compound to fill low areas. Check the surface with a level before installation.
4. Moisture Problems
- Solution: If the tile is in a bathroom or kitchen, check for signs of water damage. Install a vapor barrier under the vinyl if necessary.
5. Height Transitions
- Solution: Use transition strips or reducers to smooth out height differences between rooms. Adjust door clearances if needed.
Maintenance Tips for Vinyl Flooring Over Tile
Once your vinyl flooring is installed, proper maintenance will keep it looking great for years:
- Sweep Regularly: Remove dirt and debris to prevent scratches.
- Mop with Care: Use a damp mop with a mild cleaner. Avoid excessive water, as it can seep into seams.
- Avoid Harsh Chemicals: Use vinyl-safe cleaners to prevent damage to the surface.
- Use Furniture Pads: Place felt pads under furniture legs to prevent scratches or dents.
- Address Spills Immediately: Wipe up spills promptly to prevent staining or moisture damage.
When Should You Avoid Laying Vinyl Over Tile?
While laying vinyl over tile is often a practical solution, there are situations where it’s not advisable:
- Severely Damaged Tile: If the tile is extensively cracked, loose, or uneven, it’s better to remove it and address the subfloor.
- Moisture Issues: Persistent moisture problems must be resolved before installing vinyl, as trapped moisture can cause mold or damage.
- Significant Height Differences: If the added height creates major issues with transitions or appliances, consider removing the tile.
- Asbestos Concerns: If the existing tile is old and may contain asbestos, consult a professional for safe removal.
Conclusion
Laying vinyl flooring over tile is a viable and cost-effective way to update your space without the hassle of tile removal. By carefully inspecting and preparing the existing tile, choosing the right vinyl product, and following proper installation techniques, you can achieve a beautiful, durable floor. Whether you opt for click-lock LVP, glue-down vinyl, or peel-and-stick tiles, the key to success lies in thorough preparation and attention to detail.
If you’re unsure about any aspect of the process or encounter significant issues with the existing tile, consult a professional flooring installer to ensure the best results. With the right approach, your new vinyl floor can provide years of beauty and functionality, transforming your space with minimal disruption.